Home Blog Page 16

12 Creative ideas For Using A Can

Every week we calmly get rid of seemingly completely unnecessary empty tin cans, which used to store different goodies. But you can use them to make useful objects that are useful in everyday life and help decorate your home. We picked up 12 creative ideas for using a can. Give old banks a second life!
12 Creative ideas For Using A Can

1. Wall Decor

12 Creative ideas For Using A Can

If your hands are not for boredom, such an activity will be only joy. Using stencils, awls, scissors, colored markers or spray cans, you can create unique figures and place them on the wall of your room. This option will look especially harmoniously in the nursery or bedroom.

2. Towel Holders
12 Creative ideas For Using A Can

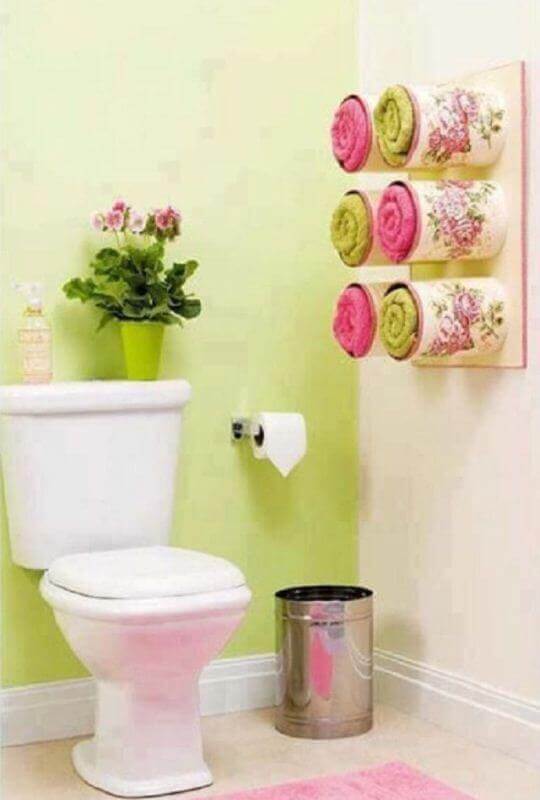
It is much more pleasant when each towel neatly lies in its place than when they hang all the pipes and doors. Tin cans again come to the rescue. The main thing is that the area of your bathroom allows you to implement this idea.

3. Design For Storing Scarves

12 Creative ideas For Using A Can

Ladies can use old tins to store their favorite neck accessories. In the spring, these wardrobe items are especially in demand.

4. Bottle Stand

12 Creative ideas For Using A Can

Another useful thing for the kitchen, for which banks are the best fit. Fasten them together and install them in a convenient place for you. Connoisseurs of aromatic strong drinks can place bottles of wine there. But vessels with sauces, oil, vinegar or other suitable liquids in the household can also be safely stored on such a stand.

5. Stand For Kitchen Appliances

12 Creative ideas For Using A Can

So that when cooking culinary masterpieces the shovels, nimbuses, and spoons you need are always at hand, store them on a shelf made of tins. You can give the banks an original design by pasting them with recipes for delicious dishes: at the right time it will be convenient to peek if you have forgotten any ingredient.

6. Needle Box
12 Creative ideas For Using A Can

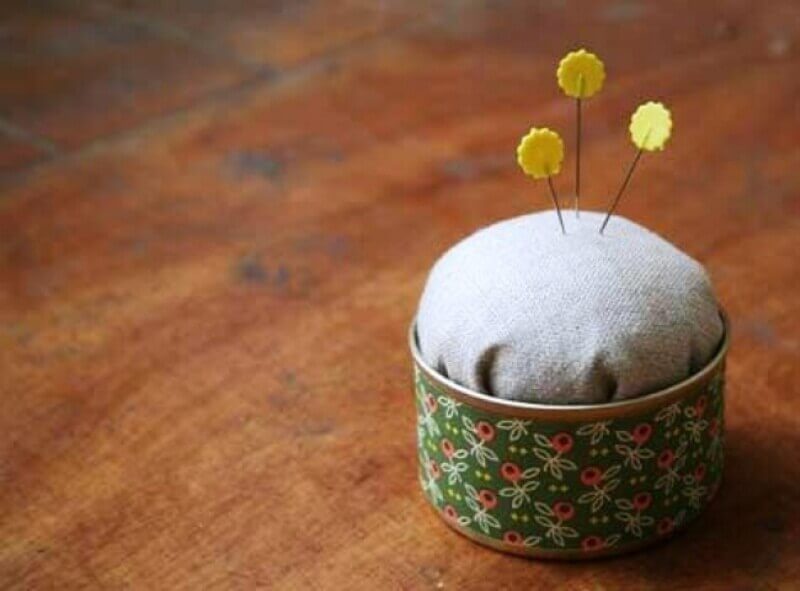
Pins and needles can easily get lost in the bowels of an apartment because of its small size. But this cannot be allowed in any way. From an old can, a piece of foam rubber and fabric, you can easily craft this cute and very useful little thing.

7. Shelf For Storing Yarn

12 Creative ideas For Using A Can

Needlewomen are also very useful for tin containers. Build a shelf for knitting balls from them, and they will never again be confused and terribly annoying. You can create a whole collection by distributing the threads according to colors, composition and other characteristics.

8. Chandelier
12 Creative ideas For Using A Can

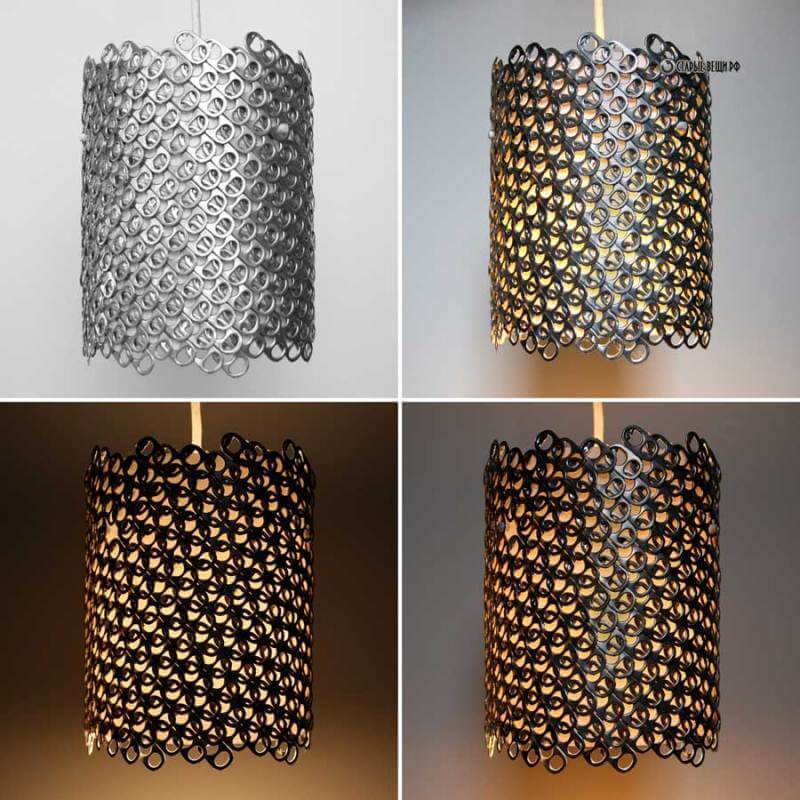
Useful objects can also be created from rings, with which cans are opened, for example, with sparkling water. Glue them together, pass a light bulb through the resulting hole, and voila! – The original chandelier is already on your ceiling.

9. Bird Feeders

12 Creative ideas For Using A Can

We ate ourselves – treat the birds outside the window. To do this, you just need to connect the jar and the tree with a ribbon, attach an impromptu perch and, of course, pour a treat for the birds. And if you also paint a tin feeder in a bright color, spring in your yard will come much faster.

10. Organizer For Stationery Or Accessories

12 Creative ideas For Using A Can

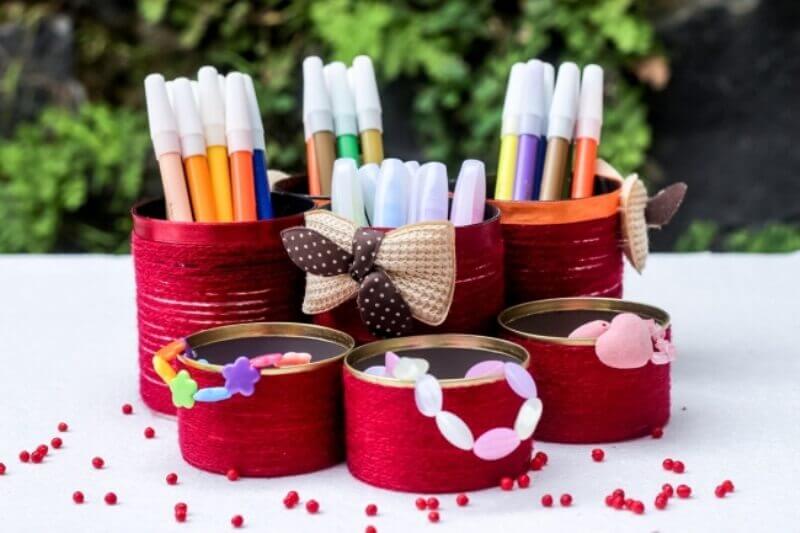
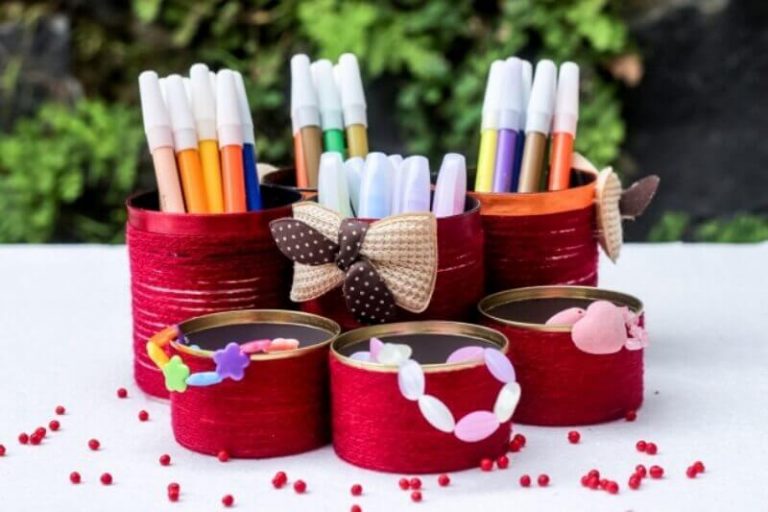
Pens, felt-tip pens, scissors, hair-bands, jewelry, and other household trifles will no longer be lost and litter your apartment. Turn on the imagination, and you will have a stylish organizer in which each thing will find its rightful place. Girls and children will definitely like this invention.

11. Candlesticks

12 Creative ideas For Using A Can

An old jar can become an unusual and rather convenient candlestick. This is useful, for example, on a summer terrace or in the gazebo, where there is no electricity. Decorate the container to your liking, hang it in the right place with a thick fishing line and place a candle in a jar. Not only practical but also romantic.

12. Flower Pots

12 Creative ideas For Using A Can

If you like fresh flowers and consider them the best decoration of the apartment, you need to pay special attention to tin assistants, because they are perfect as flower pots. Durable and very beautiful.
12 Most Unusual Bedrooms

This collection contains 12 of the most unusual bedrooms that we were lucky to see. The design of these bedrooms was designed specifically to calm and facilitate busy workdays, to inspire and entertain at the same time. Do not miss them!

1. Bedroom with access to the pool

Most Unusual Bedrooms

A great and amazing idea is to arrange an exit from the bedroom on to the pool. In addition, during this room, you’ll simultaneously relax within the fresh air without getting up from your favorite bed. But even with the windows closed, which call within the sort of wardrobe, you’ll contemplate through the glass a part of the ground to the water from the pool.
2. Bedroom By Weight

Most Unusual Bedrooms

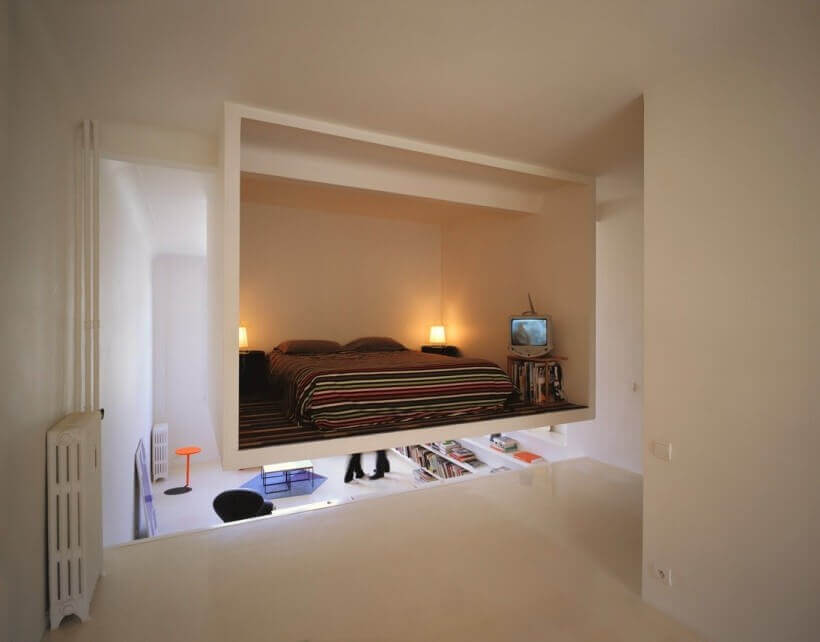
You must admit that a bedroom in limbo looks rather unusual, on the other hand definitely nobody will bother you.

3. All-Inclusive

Most Unusual Bedrooms

This unusual bedroom is formed to order for a fanatical professional who lives only to figure. But everything is at hand, even the shower. because of saying goes: “Wake up and immediately within the shower!

4. Bedroom Underwater

Most Unusual Bedrooms

This is not just a relaxation room, but an entire underwater paradise with its convex glass walls and unimaginable views!

5. With An Aquarium On His Head

Most Unusual Bedrooms


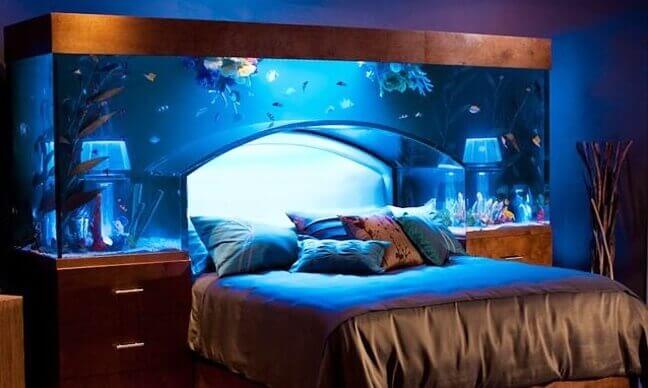
However, if underwater relaxation isn’t enough for you, perhaps this aquarium at the top of the bed will fill any of your underwater fantasies.

6. Soaring In The Air

Most Unusual Bedrooms

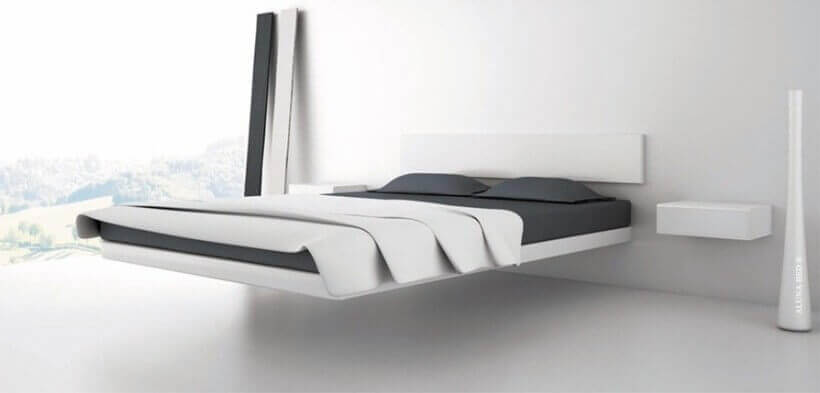
If you would like to experience a sense of weightlessness, then this resort area is made specifically for you. Minimalism style and a bed floating within the air create a sense of incredible lightness and freedom.

7. Sea View

Most Unusual Bedrooms

looking at this bedroom, one involuntarily recalls the story of Snow White and therefore the Seven Dwarfs. a really wide bed, an enormous number of pillows, the smell of the ocean and therefore the sound of waves, which might be better, right?

8. In The Clock Tower

Most Unusual Bedrooms

Brilliant light shines on the white brick walls, which adds a wonderfully textured element to the present room, and a one-of-a-kind dial rather than a window that enhances the general picture of a comfortable place to relax.

9. For Book Lovers

Most Unusual Bedrooms

This beautiful melancholy place invites residents to completely interact with the countless volumes that are everywhere.

10. Bed With Hidden Bath

Most Unusual Bedrooms

The design of this bedroom certainly saves space in your bathroom. But first of all, it’s attractive for those people that wish to soak within the bath after sleep, especially if it’s under the bed.

11. A Home Cinema

Most Unusual Bedrooms

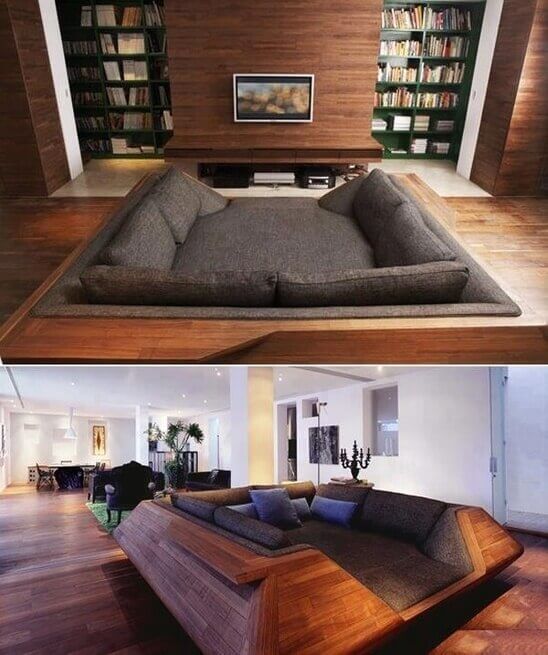
This unusual bedroom was created especially for moviegoers. the house cinema will offer you an unforgettable viewing of your favorite films among soft pillows during a cozy family atmosphere.

12. Round Bedroom

Most Unusual Bedrooms

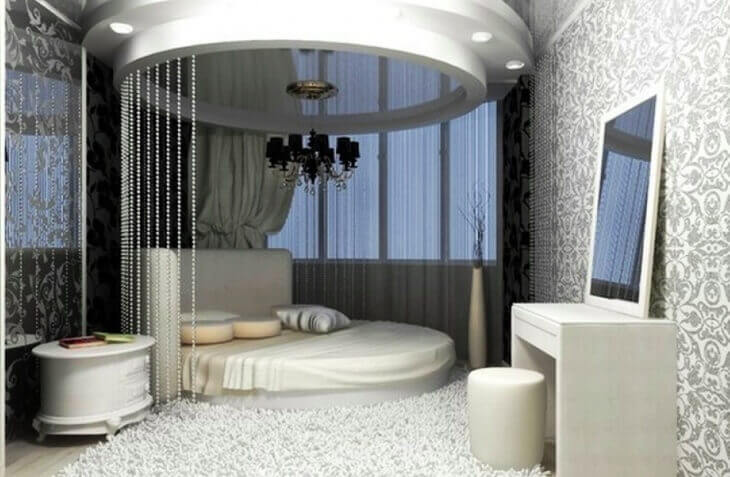
Round bed during a non-standard room. Even during a round room, you’ll beat the space to good use.

12 Unusual ideas for Decorating Easter Eggs

0

Easter eggs are an integral element of Easter. Undoubtedly, eggs decorated in traditional ways will never get boring. However, this time team DIYhometalk.com offers you 12 unusual ideas on the way to decorate Easter eggs during a modernized way and continue with 2020 fashion trends.

Unusual ideas for Decorating Easter Eggs

1. Golden Eggs

Unusual ideas for Decorating Easter Eggs

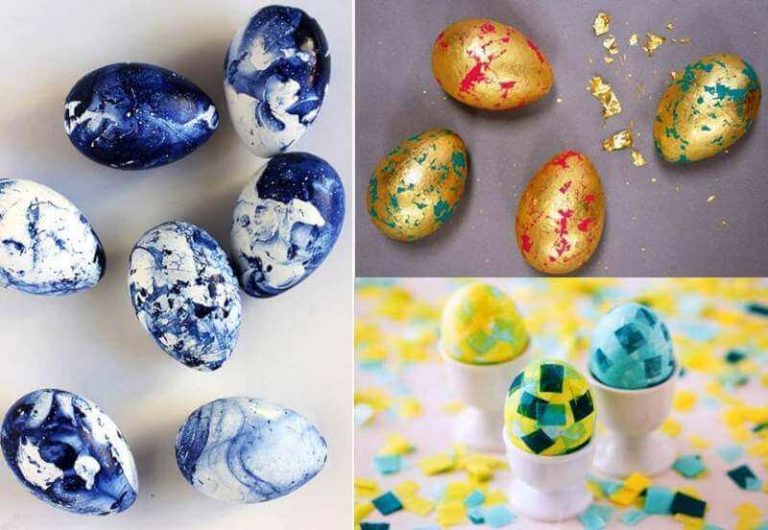
Color the eggs in any color, allow them to dry. Then, with glue, glue the pieces of gold foil and you’ll get beautiful gilded paint.

2. Emotional Easter Eggs

Unusual ideas for Decorating Easter Eggs

Such Easter eggs will definitely be appreciated by people with a way of humor. To form them, just use a marker and a touch imagination to draw the emotions of your little puppies.

3. Abstract Eggs

Unusual ideas for Decorating Easter Eggs

Agree that such eggs look quite original and weird, and making them is as easy as shelling pears. To try to do this, you would need colored nail polish. Pour cold water into a bowl. Add the varnish there, mix lightly and dip the egg there. Then remove carefully and dry. Everything, 2020 abstract easter egg is ready.

4. Shiny Dye

Unusual ideas for Decorating Easter Eggs

Making such shiny Easter eggs is very simple, but they’re going to become a spectacular decoration for Easter. The center of the dye must be pasted with tape. Apply glue to the remainder and sprinkle generously with sparkles. After the glue has dried, remove the tape. This decoration looks modern and original.

5. Themselves With A Mustache

Unusual ideas for Decorating Easter Eggs

Another unusual idea for people with a way of humor. Cut white mustache of various shapes. Paint black and glue on boiled eggs. You’ll buy ready-made mustache stickers.

6. Cosmic Eggs

Unusual ideas for Decorating Easter Eggs

Such Easter eggs will appeal not only to fans of Star Wars but also to fans of the starry sky. First, they have to be painted in plain black. When the primary coat is dry, a little number of other colors should be applied with a dry brush: blue, pomegranate, purple, bright orange, a touch gold. At the top, you should spray a touch white paint in order that Pieris rapae spots, that is, stars, remain on the egg.

7. Eggs From Multi-Colored Napkins

Unusual ideas for Decorating Easter Eggs

Cutting out colorful napkins may be a much simpler decoupage option and an excellent idea for Easter 2020. For such Easter eggs, you’ll need smooth paper napkins of 2-3 colors. They Should be cut small squares of equivalent size. the entire egg should be covered with glue, and alternately glue the square pieces.

8. Lamb Eggs

Unusual ideas for Decorating Easter Eggs

Easter eggs in the form lambs look original and pleasant. For his or her manufacture you’ll need eggshells, cotton yarn, napkin, and glue. Glue the shell with glue, and wrap with yarn without leaving spaces. Then cut out the eyes, nose, and ears from the colored paper and stick it within the right place. Original easter decoration ready.

9. The Human Egg

Unusual ideas for Decorating Easter Eggs

Another variation of the decoration, but this point rather than the sheep maybe a striped little man with a mustache. Here you would like a felt-tipped pen and a way of humor. With such tools, it’s easy to vary an egg into a mustachioed uncle during a retro suit or the other character of your choice, the most fantasy!

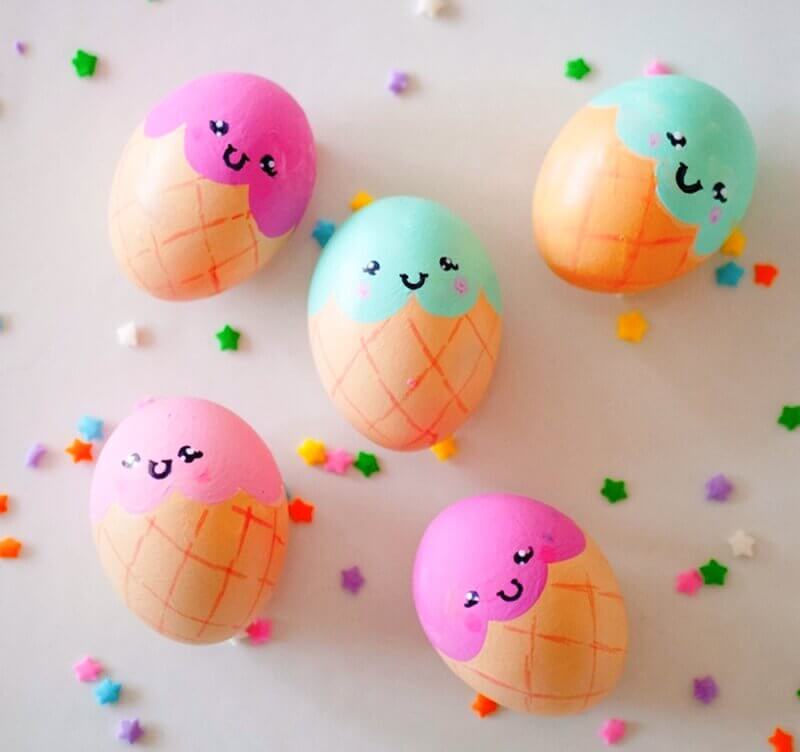
10. Ice Cream

Unusual ideas for Decorating Easter Eggs

Ice cream eggs look cute and appetizing. Most of all, children will like them. Only pastel colors and felt-tip pens are needed. Color the boiled eggs as shown.

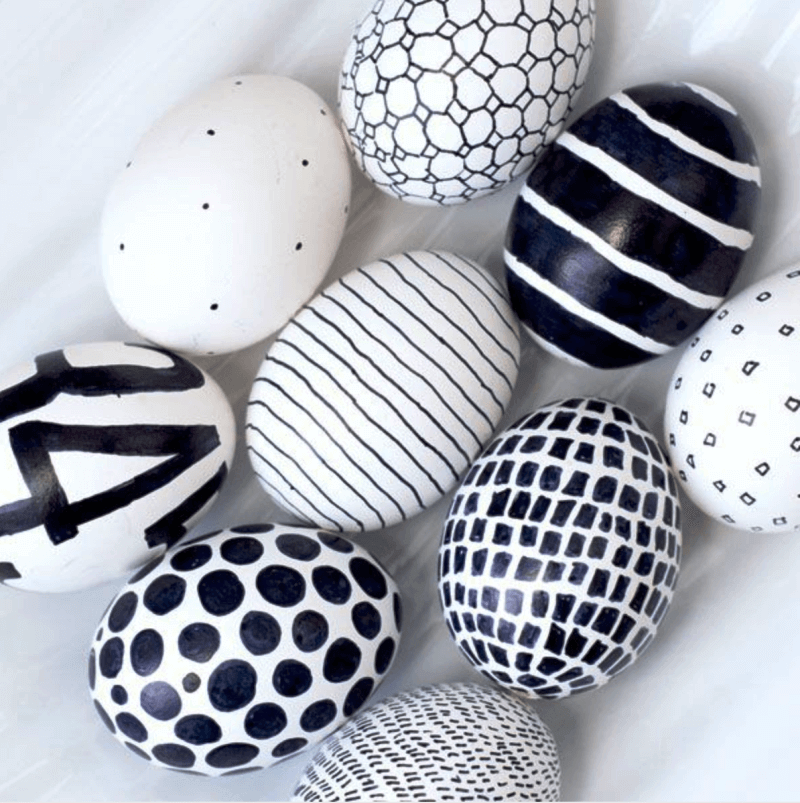
11. Black and White Style

Unusual ideas for Decorating Easter Eggs

Modern Easter eggs with abstract patterns in black and white styles are made very simple. All you would like maybe a black marker and white eggs. Everything else may be a matter of your imagination: stripes, dots, numbers, and letters, or more complex patterns. you’ll write greetings on Easter and needs to relatives and friends.

12. Natural Dyes

Unusual ideas for Decorating Easter Eggs

An offer for those that value naturalness and ease. a fragile pattern is best through with light paint and a skinny brush. Such patterns don’t require special drawing skills, but they appear environmentally friendly.

Top 10 Most Important Tips for Framing Out Mirrors

Here is a list of our some really helpful tips for successfully frame out your builder-grade mirrors. This whole project was very easy not difficult. You can make this whole project in only two days and it will cost only Twenty dollars.

Top 10 Most Important Tips for Framing Out Mirrors

Since last many days, I have seen many posts for how to mirrors frame out so I start making this I try again and again until I have successfully accomplished this very simple update. I also failed and failed during my project making but I do not lose our hope.
Here are some of the most important tips for you if you try to first time for making this whole project. These all tips help you a lot.

Materials used for this project:

  • Molding.

  • Chalk.

  • Apple Barrel Acrylic Paint Set.

  • Liquid Nails.

Top 10 Most Important Tips for Framing Out Mirrors

Step One

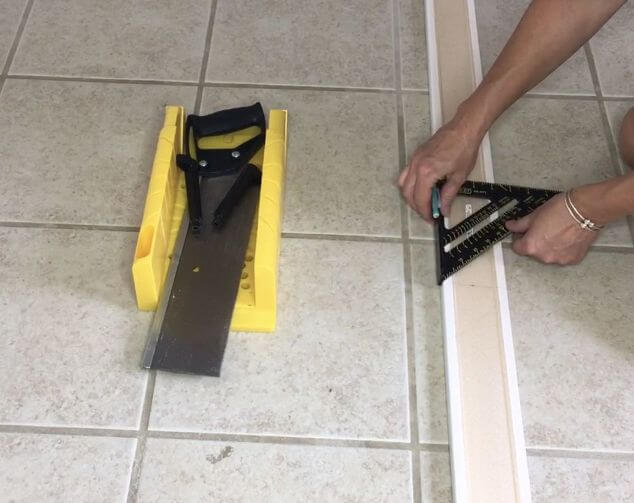
In this step, you can use your tools of right. This two tools speed square and miter box are most important for making this project. This tool helps a lot in this project making without this tools you can complete your project but it not easy without using these tools. These both tools are very cheeped the worth of these two tools are like a penny.

Top 10 Most Important Tips for Framing Out Mirrors

Now using inch tape you measure the whole length and width of your wall mirror.
In my case, I am using a full-length large mirror to my closet and the above two mirror for vanities of a bathroom. Which am I would like to do my frame?

Top 10 Most Important Tips for Framing Out Mirrors

If you do not have to mold in your home so you can purchase it for a compliment or you have mold in your home so when you use it and you also choose some different which is you like.

Step Two

If you want to save your time so you can purchase the molding of prepainted.Which is cost little more but it saves a lot of your paint and time.

Top 10 Most Important Tips for Framing Out Mirrors

Step Three

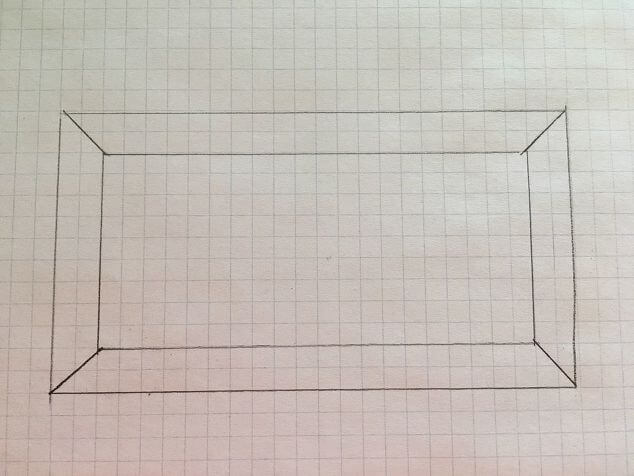
Now you can frame out your mirror by drawing a picture.
This picture looks like a silly but it is always stumped to me. Which is the way to make these cut? At the end of these, you would be surprised how much your molding is waste during you cutting your molding in the wrong way.

Top 10 Most Important Tips for Framing Out Mirrors

Step Four

The back side of this flat is very easy to mark. So you measure the back side of your molding and marked it to back.

Step Five

After your measurement of molding to back with the help of square now, you draw a straight line from top to bottom to the width of your molding.
The molding edge of the outside is very thicker part.

Step six

Now you use your drawing which is guided by you, then place your ruler of diagonal to the square of speed in the top of the line which is the thicker part. Then make a line of diagonal which is you cut as you need it then refer it to your drawing.

Top 10 Most Important Tips for Framing Out Mirrors

Step Seven

Than placing down your molding to the front side because you are cutting back side of your molding. This whole process gives us less splintering.

Sten Eight

Now place the edge of the outside or thicker side which is the side of the miter box. Then put a diagonal line to miter box for cutting guides. Place your molding hold by using black pins. Then cut your molding and sand it to the edges of the cut.

Top 10 Most Important Tips for Framing Out Mirrors
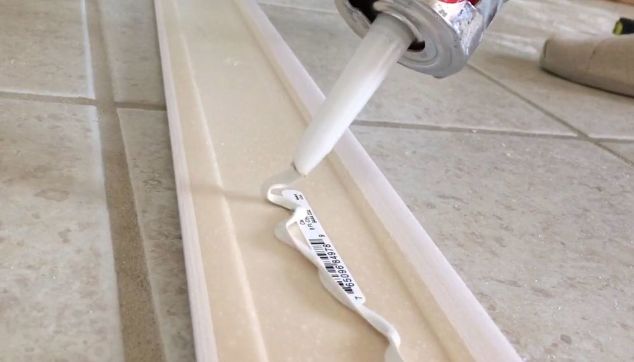
After cutting your all piece of molding than to the back side of molding you apply nails of liquid.

Step Nine

You do not apply nails of liquid to the middle of your molding you also apply it to the back of bottom and top.

Top 10 Most Important Tips for Framing Out Mirrors

Pieces of mirror you stick directly to your molding.
Than Remove liquid nails to any place on the wall and mirror which is oozed on it.
Now using tape of painter’s you can hold your molding to place it for dry and especially use it to all corners.
Wait for the next 24 hours until the dry completely.

Top 10 Most Important Tips for Framing Out Mirrors

Remove your all tape of painter’s after you molding is completely dried.
Corner joint by using chalk. Then you remove the excess of chalk using a towel or paper.
Now touch up the cuts of mitered by paints.

Step Ten

If you like it when you use a Q-tip of dipped by paint for a few touch-ups.

Top 10 Most Important Tips for Framing Out Mirrors

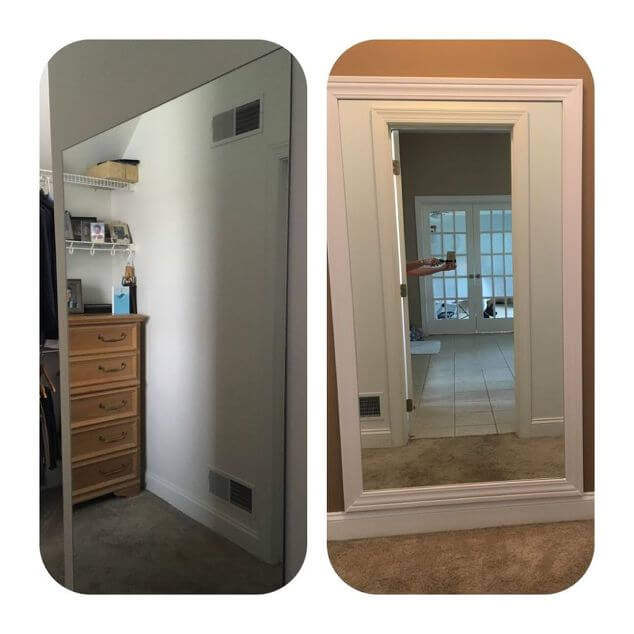
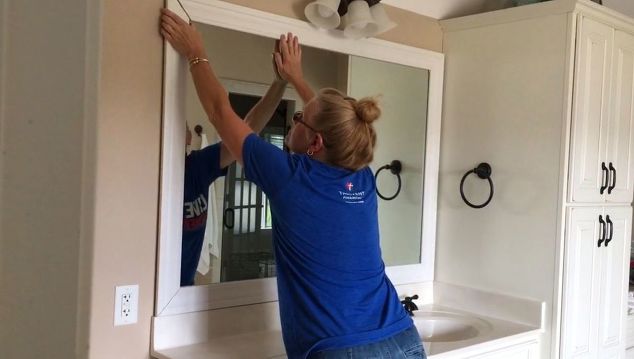
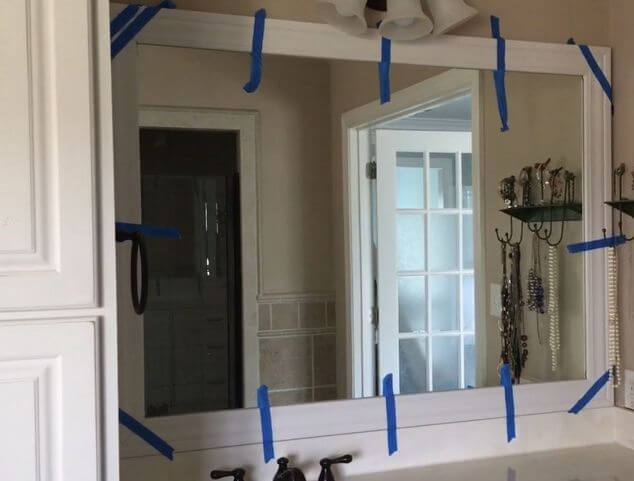
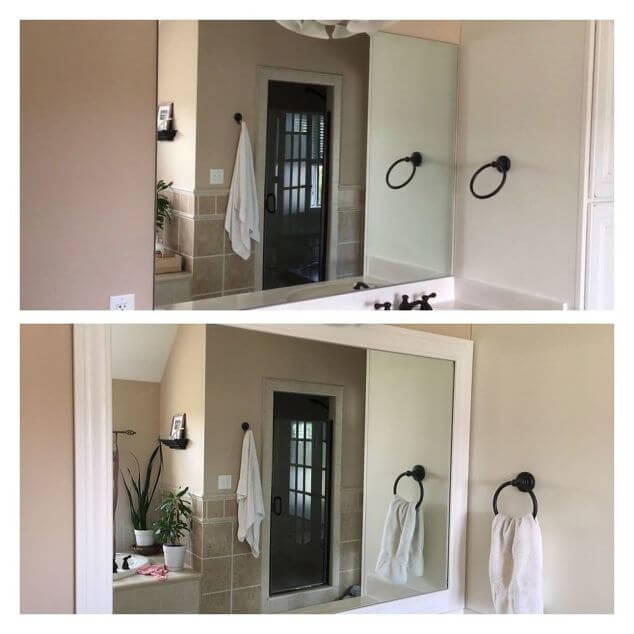
Here are our project images which are with before full-length mirror and after full-length mirror.

Top 10 Most Important Tips for Framing Out Mirrors

Here is another our at the bottom and before top vanity of our only one mirror.
I hope to say that ow you can easily success by updating your mirror around your first time try.

How To Sew A Textile Box Made Of Fabric

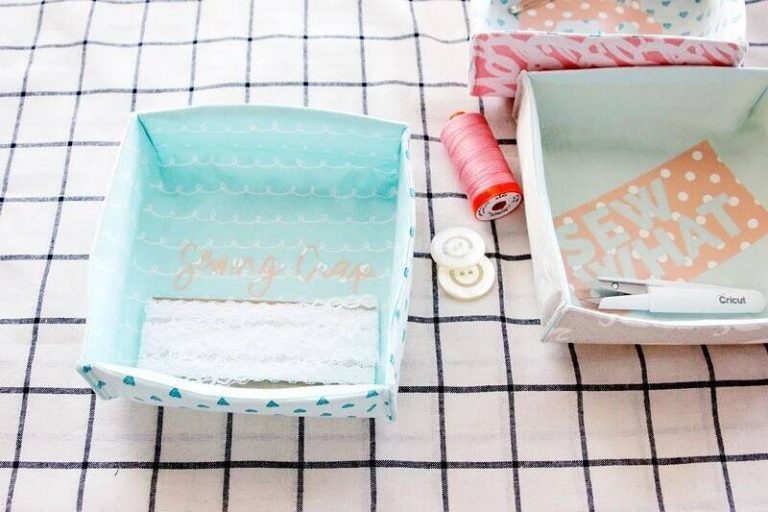
In this simple way, you can make a comfortable and durable fabric box, which will be good to keep the shape.

How To Sew A Textile Box Made Of Fabric
Simple template + simple manufacturing principle = comfortable fabric boxes. Strength gives them a thin dense felt added between the layers of fabric.
Having made several boxes, you can use it to organize needlework supplies, clothes, little things, and so on.

YOU WILL NEED:

  • Paper, ruler and pencil or printer, paper scissors for the template;
  • 2 types of fabric, for the outer and inner sides of the box;
  • Thin dense felt / felt for laying
  • Chalk or marker for tissue
  • Scissors for fabric
  • Tailor pins
  • Sewing machine and thread
  • Iron and ironing board;
  • If desired – a print for decoration

STEP 1

How To Sew A Textile Box Made Of Fabric

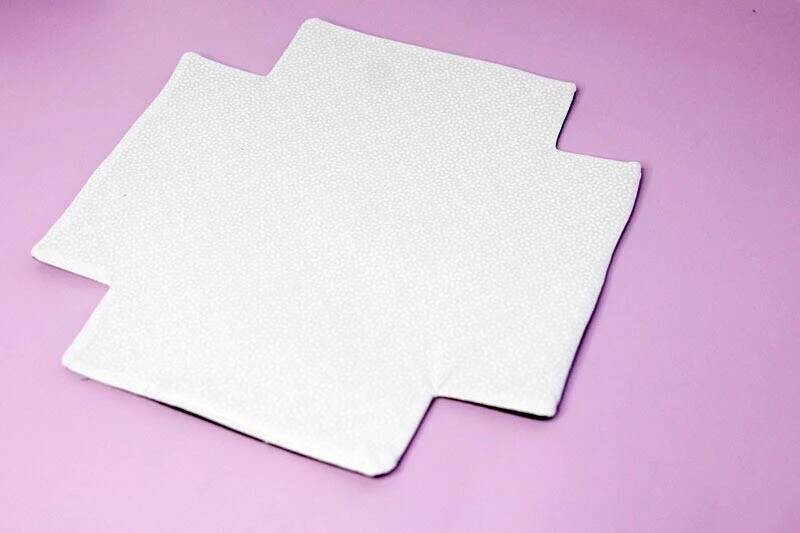
Make a template for the box.
A = B (height of the walls of the box).
For a square box, C = 2 x D (width and length of the box).
For a rectangular box, select the desired ratio of length to width.
0.5 cm allowances on each side are best taken into account immediately in the template.

STEP 2

Textile Box Made Of Fabric

Cut 3 identical parts for each box: 1 from fabric for the outside, 1 from fabric for the inside, 1 from felt.
Fold the details: the felt part, the outside detail face up, the inside detail upside down.

STEP 3

Chip all the layers with pins and lay the stitch by stitching them. Leave 0.5 cm from the edges. Leave a hole for turning out.

STEP 4

How To Sew A Textile Box Made Of Fabric

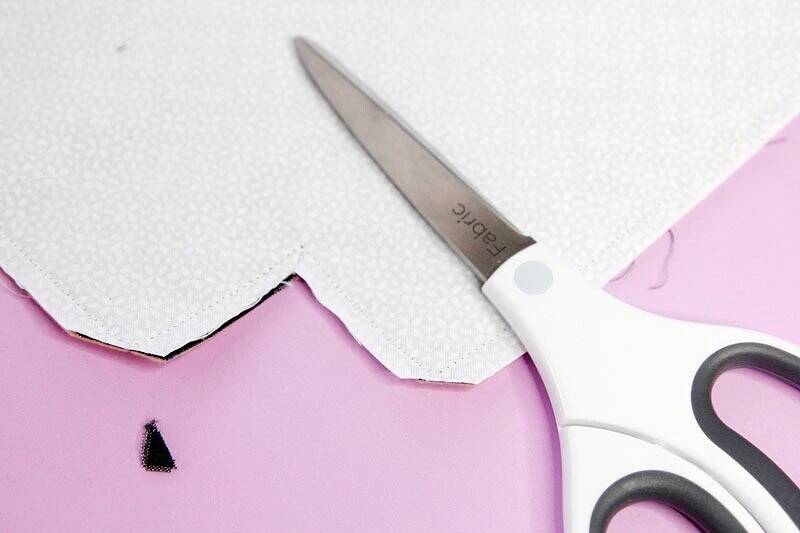
Cut off the outer corners, and in the inside, make notches.

STEP 5

Turn the workpiece out, straighten the corners well, iron it. Stitch the eversion hole or sew it in manually with a blind seam.
Transfer the drawing to the central part of the inner side of the workpiece.

STEP 6

Now you need to fold and stitch the walls of the box. Perhaps these lines will have to be performed slowly. At the beginning and end, make tacking. Cut the strings – done.

10 Top Unusual Design Of Fireplaces

Not goodbye ago, two designers from Australia presented their unusual design for brand spanking new Age style fireplaces. The foremost interesting within the design of fireplaces is fire because it seems that it burns by itself. Just unbelievable!

Unusual design of fireplaces

Designers were inspired by the effect of fire, as a result of which the thought of creating such unusual fireplaces was born. They wondered the way to transfer fire into space, and that they did it alongside this, they solved all the issues related to soot, ash and therefore the presence of a chimney.

Unusual design of fireplaces

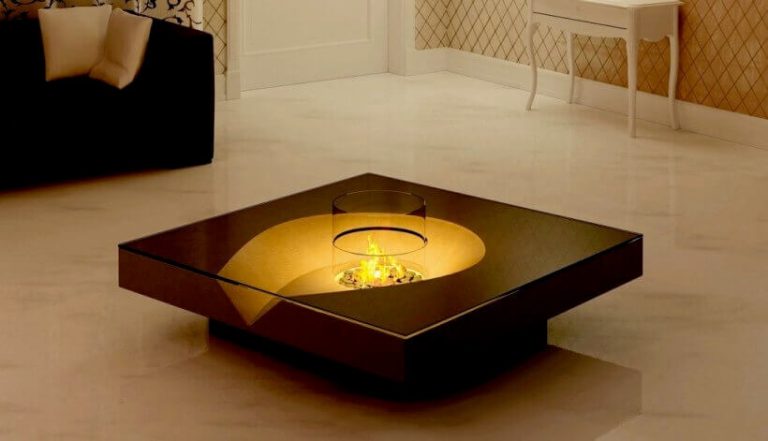
A fireplace with an open facade is suitable for creating a romantic atmosphere.

Unusual design of fireplaces

With this “open fire,” you’ll impress friends and colleagues

Unusual design of fireplaces


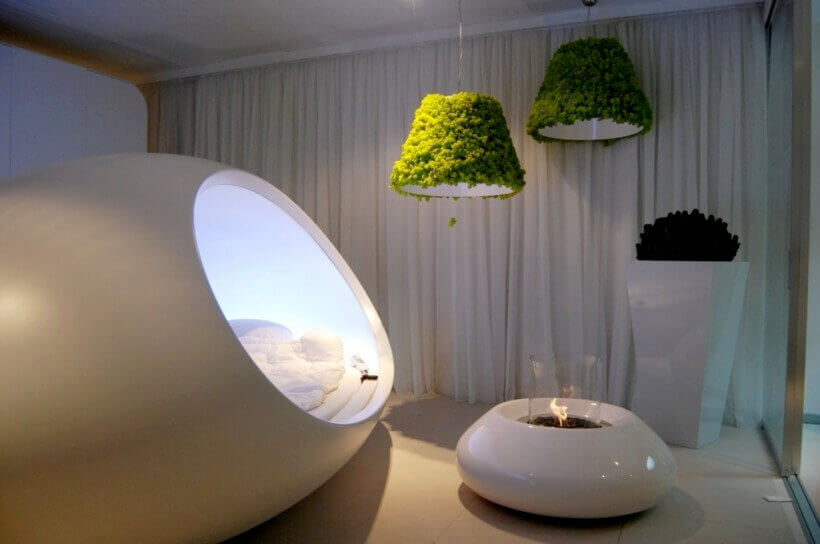
Autonomous fireplaces allow you to rework any, even the foremost modest room into an area filled with romance

Unusual design of fireplaces

watching such an indoor, Bond films are recalled

Unusual Design Of fireplaces

An open flame right your home bar will make an enduring impression on your friends

Unusual design of fireplaces

Creative bedroom interior option

Unusual design of fireplaces

A hearth within the sort of a vase creates a comfortable light and fits on any, even a little table

Unusual design of fireplaces

Several compact fireplaces installed within the hotel lobby will surely be remembered by visitors.

12 Unusual Sinks For The Bathroom

In our new collection today we’ve collected the foremost creative and modern sinks for the toilet. They’re going to be an excellent and modern decoration option. If you option to exchange your old sink with a replacement one, and you’ve got no ideas, then see below!

12 Unusual Sinks For The Bathroom

Sinks within the bathroom photo:

12 Unusual Sinks For The Bathroom

1. Unique ceramic bowl painted within the shape of a bowl

12 Unusual Sinks For The Bathroom

2. The stylish metal sink within the bathroom for lovers of oriental style

12 Unusual Sinks For The Bathroom

3. Amazing minimalist floor sinks for an outsized bathroom

12 Unusual Sinks For The Bathroom

4. An outsized patterned mirror on the dark wall and a snow-white sink within the design of the toilet

12 Unusual Sinks For The Bathroom

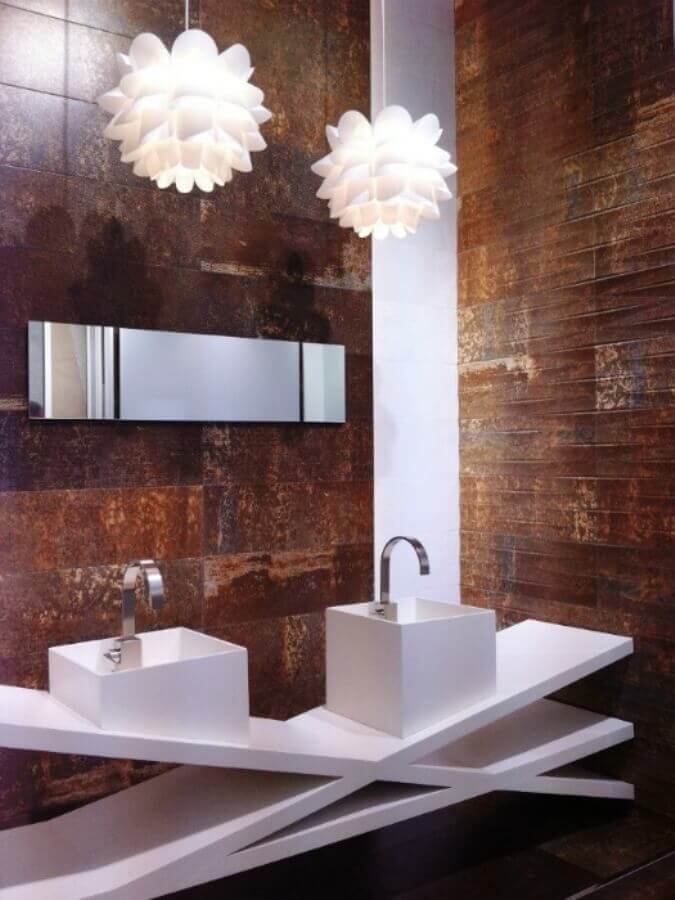
5. The incredibly stylish design of white sinks and flower chandeliers

12 Unusual Sinks For The Bathroom

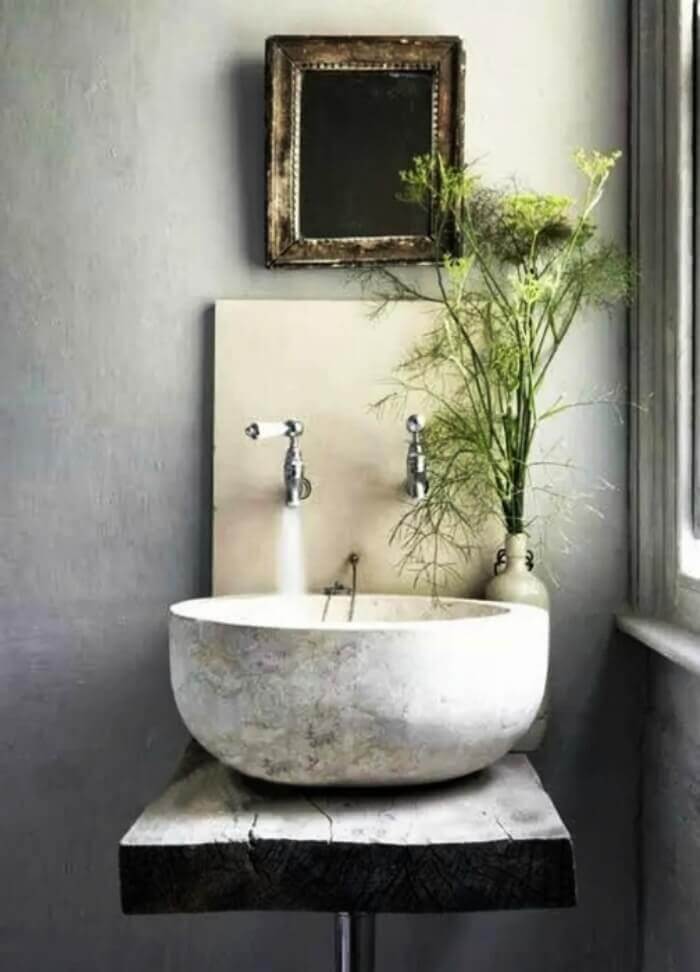
6. Stone washbasin on an easy wooden board for those that like rustic style

12 Unusual Sinks For The Bathroom

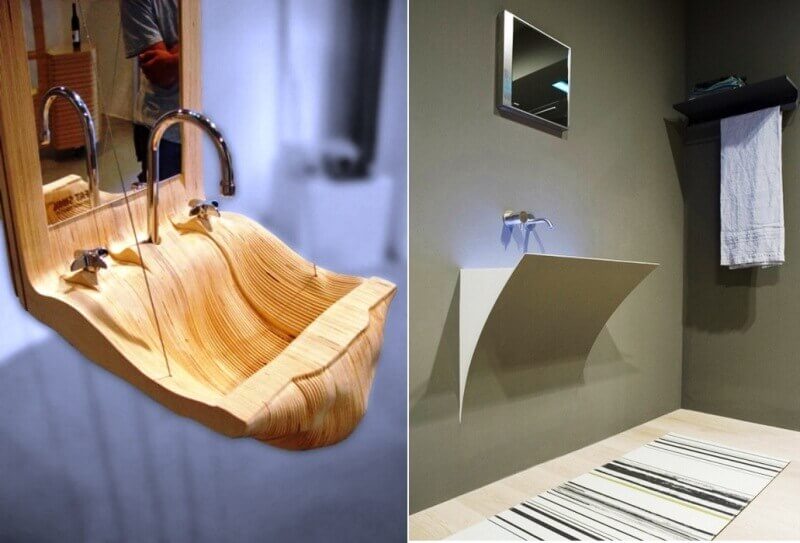
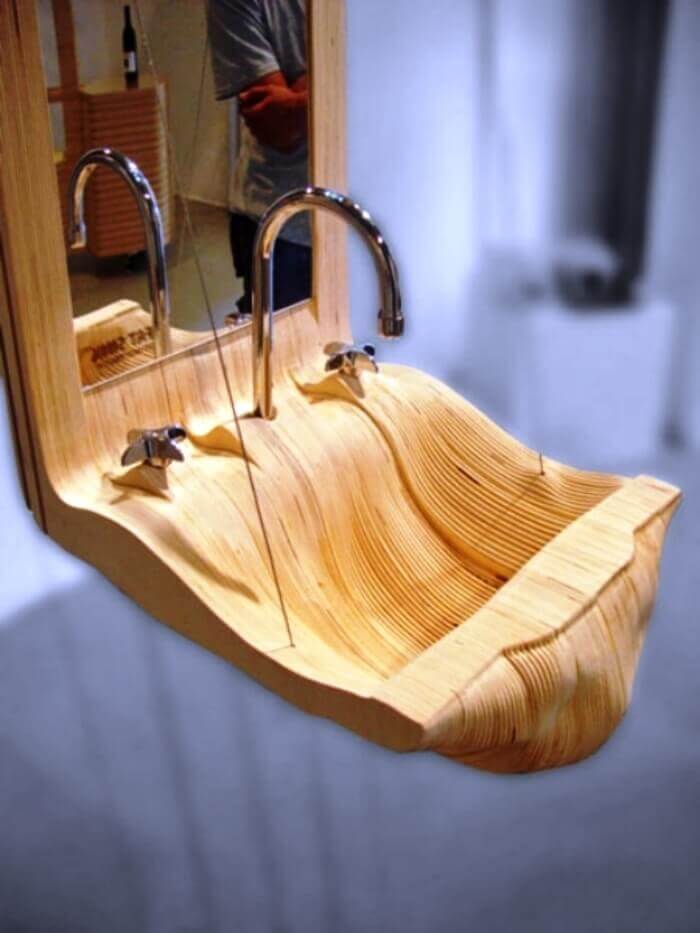
7. An unusual sink made from wood with a mirror

12 Unusual Sinks For The Bathroom

8. An expensive mosaic bathroom with a navy sink

12 Unusual Sinks For The Bathroom

9. A really creative washbasin that appears sort of a cracked piece of tile

12 Unusual Sinks For The Bathroom

10. A gorgeous glass sink within the sort of flowing water

12 Unusual Sinks For The Bathroom

11. The non-standard choice for the toilet – a concrete sink within the sort of a brook

12 Unusual Sinks For The Bathroom

12. Fashionable designer white washbasin with photo printing

10 Real Ways To Remake Sneakers

0

Sneakers will never go out of style, as they blend perfectly with jeans or other clothes. But it happens that ordinary sneakers bother, and you want something new, but not enough finance. But do not despair, because there is always a way out! diyhometalk offers 10 real ways to remake sneakers using improvised tools and make them original and fashionable!

10 real ways to remake sneakers

DIY sneakers

1. Sequins

With sparkles, you’ll transform sneakers.

10 real ways to remake sneakers

Material Required:

  • PVA glue.
  • masking paper.
  • Gold sparkles (about 50 grams).
  • a little sponge.

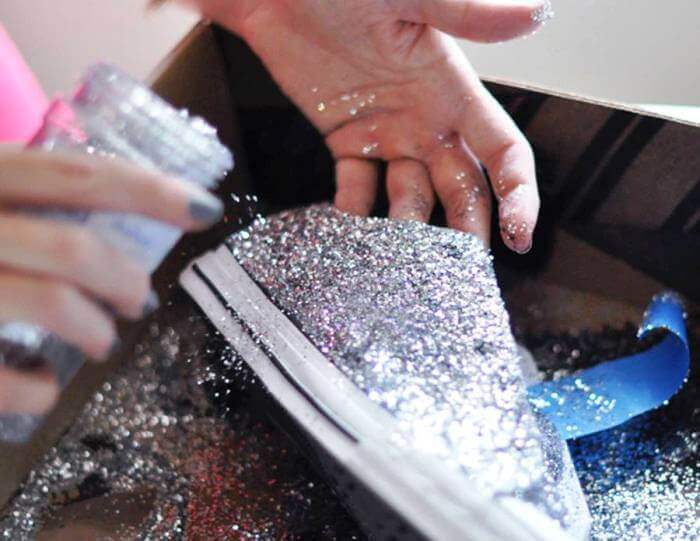
Place old newspapers inside the sneaker, and tape over the places you don’t want to hide with sequins. Mix glitter with PVA glue. Cut a bit of sponge and begin applying a mix of glue and sparkles to the sneakers. await the mixture to dry, then add another layer as desired.

2. Sequins

Another possible way to remake sneakers is sequins. This project would require a touch more patience and time, but you’ll just like the result.

10 real ways to remake sneakers

Material Required:

  • Sequins.
  • Thread and needle.
  • Band-aid or thimble.

It’s best to hide your fingers with a band-aid or use a thimble because it is going to be quite difficult to flash a needle through dense material. Sequins got to be sewn one by one to the sneakers until you cover the whole desired area.

3. Sequins and rivets

10 real ways to remake sneakers

Another possible way to use sequins and rivets to embellish a sneaker.

Material Required:

  • Silver sparkles.
  • Silver rivets.
  • Glue.
  • Scotch.
  • Sponge.
  • Old newspapers.

Remove the laces and place old newspapers or plastic bags inside the sneaker. Tape the only of the sneaker with tape. Attach the rivets with glue to the sneakers and press firmly. Mix glue with sparkles and sponge apply on the remainder of the sneaker.

4. Ombre

The fading effect remains in fashion and is employed in everything from clothing to manicure and hair.

10 real ways to remake sneakers

Material Required:

  • Orange or yellow paint.
  • White sneakers.
  • Soda.
  • Toothbrush.

How to decorate sneakers

5. Zebra pattern

Remove the laces and immerse the front of the sneaker 1/3 within the paint. Wet a cloth and spread the paint with a cloth. Hang to dry the paint. After drying, clean the only with water and soda.

10 real ways to remake sneakers

Material Required:

  • Black paint.
  • Sequins (optional).
  • Scotch.
  • Old newspapers.

Place old newspapers inside the sneaker. Cut pieces of tape into long strips of arbitrary shape and glue the sneaker to the surface. Tape over the only. Then paint the shoes with black blacking and let it dry. then, remove the tape, and you’ve got a zebra drawing ready.

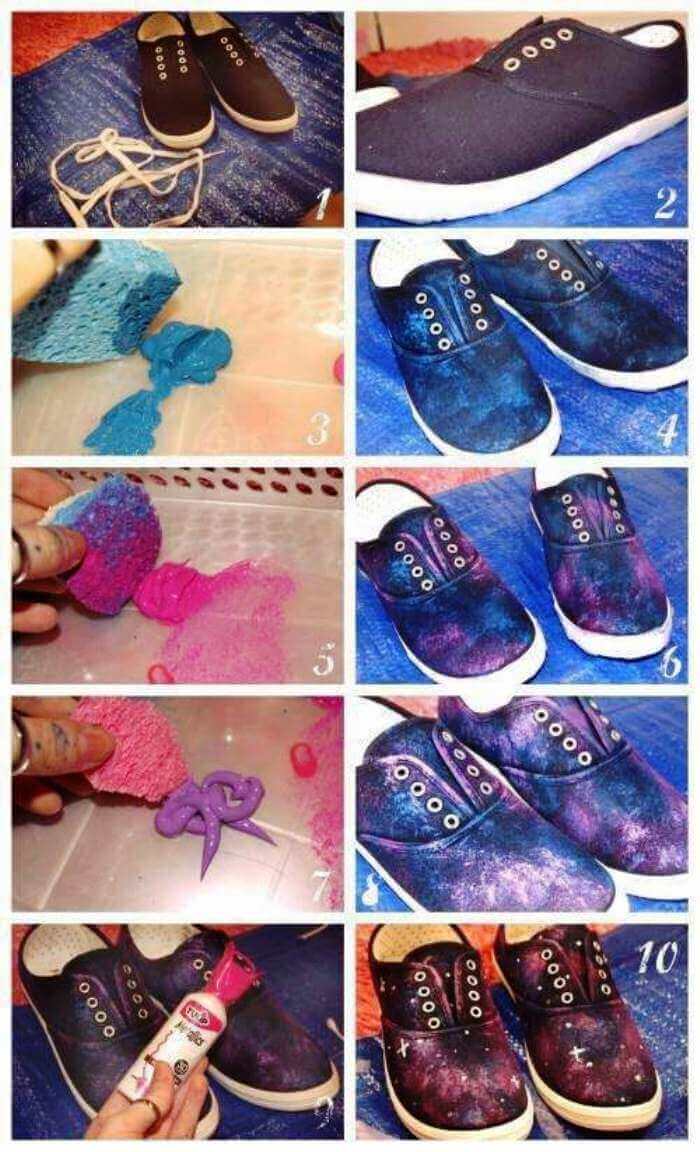
6. Galaxy

10 real ways to remake sneakers

Material Required:

  • Paints. Sponges.
  • Tassels.
  • Sealing Spray.
  • Glitter paint.

Tape the only with tape. Use a sponge or brush to use paints of various colors on the sneakers. to make the effect of a starry sky, take a touch white paint on the toothbrush and spray it on the surface together with your finger (you also can apply paint with sparkles). After drying, apply a sealing spray.

Beautiful sneakers

7. Geometric Design

10 real ways to remake sneakers

Material Required:

  1. Marker for cloth.
  2. Scotch tape (optional).

Remove the shoelaces. With a cloth marker, begin to draw a herringbone pattern. to form the image even, use tape.

8. Here is another possible way to decorate sneakers with multi-colored markers.

10 real ways to remake sneakers

9. Ribbons

10 real ways to remake sneakers

you’ll try replacing the laces on sneakers or sneakers with beautiful ribbons.

10. Lace sneakers

10 real ways to remake sneakers

Material Required:

  1. Lace
  2. Fabric Adhesive
  3. Scissors

Cover the surface of the sneaker with glue and glue the lace on top. stop excess parts with scissors.

DIY Easter Candles in The Shape Of Eggs

0

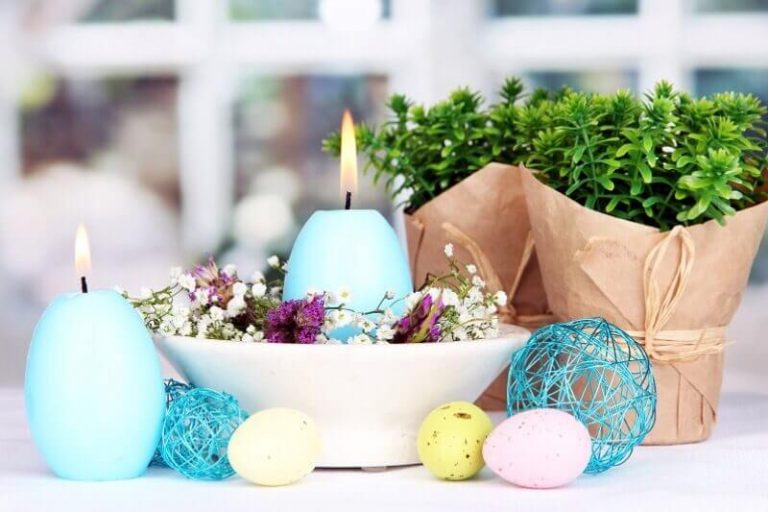
Today we would like to share with you the thought of the way to make Easter candles within the shape of eggs together with your own hands. Such original candles won’t only create festive decor but also will decorate any Easter table. Using our detailed instructions, you’ll make colorful and fragrant Easter candles together with your own hands, and it doesn’t take you much time and energy to make such colorful decor.

DIY Easter candles in the shape of eggs

So, the required material for creating Easter candles within the shape of eggs:

  • A few empty eggshells.
  • Paraffin flakes.
  • Several candle wicks.
  • Parchment paper.
  • Paper cups.
  • Wax crayons.
  • Essential oils (optional).

The primary step is to organize the eggshell, freeing it from the contents inside (blow through a little hole within the apex). If you would like big Easter candles, you ought to take the duck eggs.

DIY Easter candles in the shape of eggs

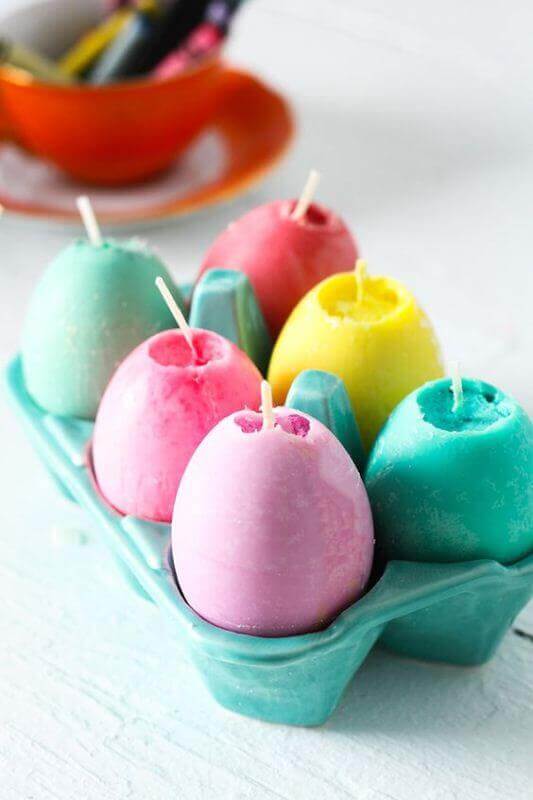
Next, you would like to grind one crayon into small crumbs and divide it in half into two paper cups. Then you would like to fill them with paraffin flakes and place them within the microwave for heating. a few times, the mass should completely melt. you’ll add any aromatic oil, while quickly stirring until smooth.

DIY Easter candles in the shape of eggs

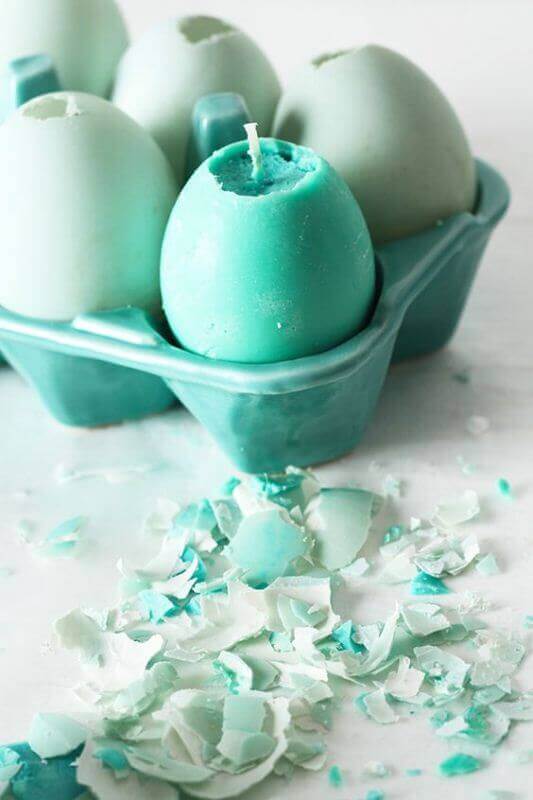
Place the wick for the Easter candle inside the shell, along its wall. then, attempt to quickly pour the molten wax into rock bottom and a part of the wick within the shell. Pour a little amount of molten mass onto parchment, pressing rock bottom of the shell with the wick to the drop. Wait until the wax has completely hardened because this may make it easier for you to figure with eggshells.

DIY Easter candles in the shape of eggs

Before pouring the remaining molten wax, confirm that it cools down a touch, otherwise, the mass will melt the frozen base inside the shell and slide the wick glued to the wall. After filling in one shell, repeat steps 1 to 4, using other colors of pencils.

DIY Easter candles in the shape of eggs

Thus, when the molten paraffin (or wax) inside completely hardens (it will take approximately 3–3.5 hours).

DIY Easter candles in the shape of eggs

You’ll carefully remove the shell, cut the wicks and lightweight your Easter candles.

Unusual Furniture That You Want To Eat

More than anything, we like to eat, someone likes nutriment, and someone wholesome fruits and vegetables or a delicious dessert. People love food, and other people need to eat to live! So it’s not surprising that creators from around the world were inspired to make unusual furniture that you simply want to eat.

Unusual Furniture That You Want To Eat

Bed “pizza”

Unusual Furniture That You Want To EatA huge ice cream shop

Unusual Furniture That You Want To EatDog Shin Pillow

Unusual Furniture That You Want To Eat

Cupcake Stools

Unusual Furniture That You Want To Eat

Hamburger Round Bed

Unusual Furniture That You Want To Eat

Chocolate Sink and Bath

Unusual Furniture That You Want To Eat

Baked Potato Bean Bag Chair

Unusual Furniture That You Want To Eat

Cream pouf

Unusual Furniture That You Want To Eat

Sofa “bowl of sweets”

Unusual Furniture That You Want To Eat

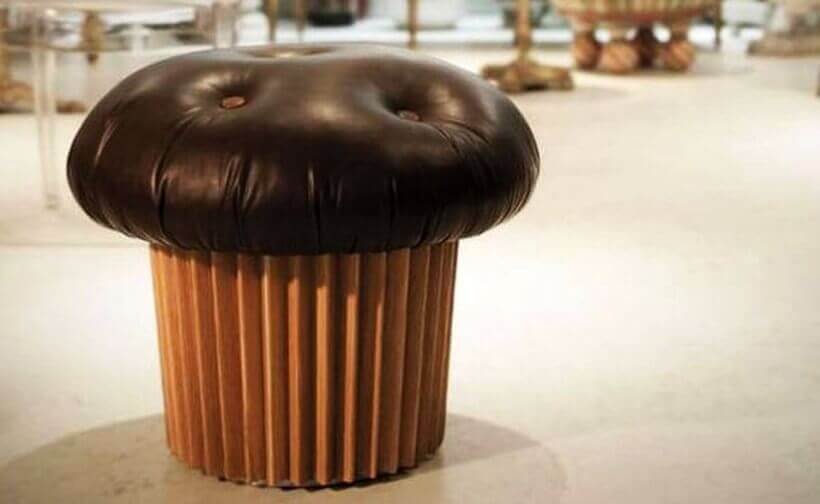
Pouf “Mafin”

Unusual Furniture That You Want To Eat

Armchair “Horn”

Unusual Furniture That You Want To Eat

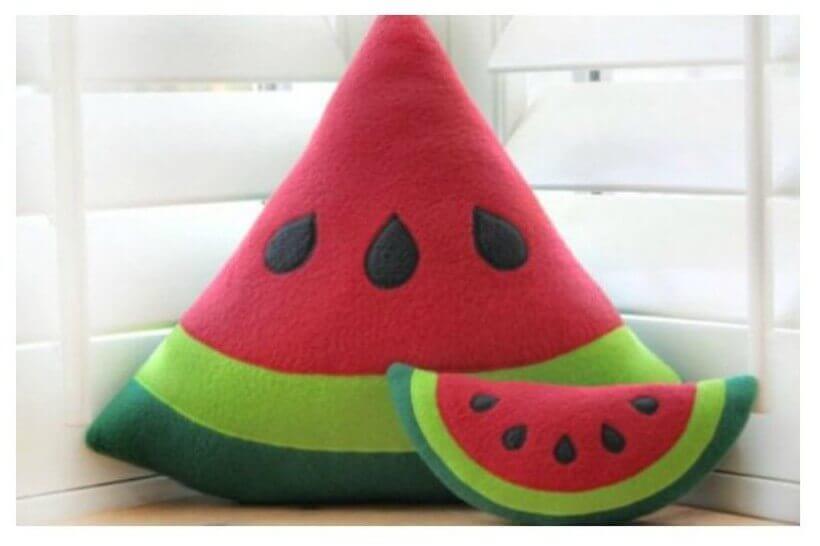
Watermelon Slice Pillow

Unusual Furniture That You Want To Eat

Sleeping Bag “Pizza”

Unusual Furniture That You Want To Eat

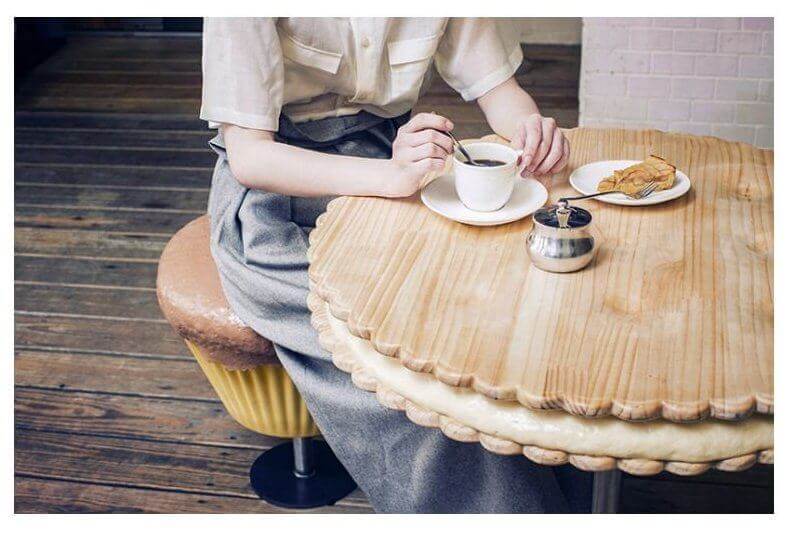
Little table “cookie”

Unusual Furniture That You Want To Eat


Fried Egg Mat

Unusual Furniture That You Want To Eat

Meat stool

Unusual Furniture That You Want To Eat

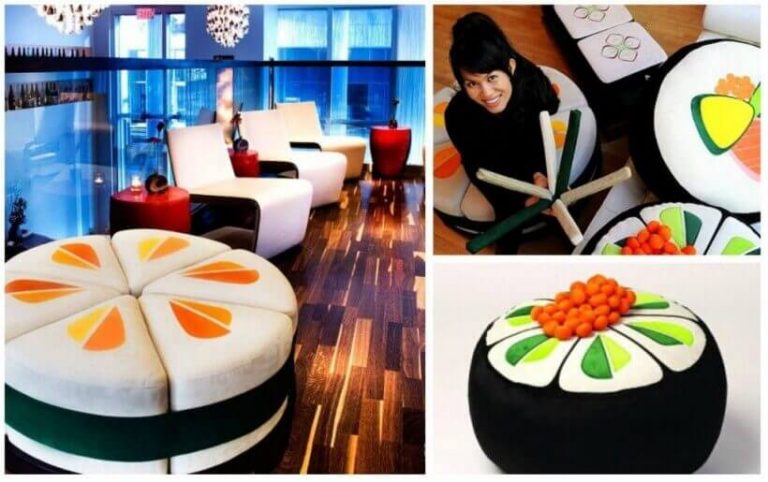
Sushi furniture

Unusual Furniture That You Want To Eat

Candy covered chair

Unusual Furniture That You Want To Eat

A sofa in the form of a cake